
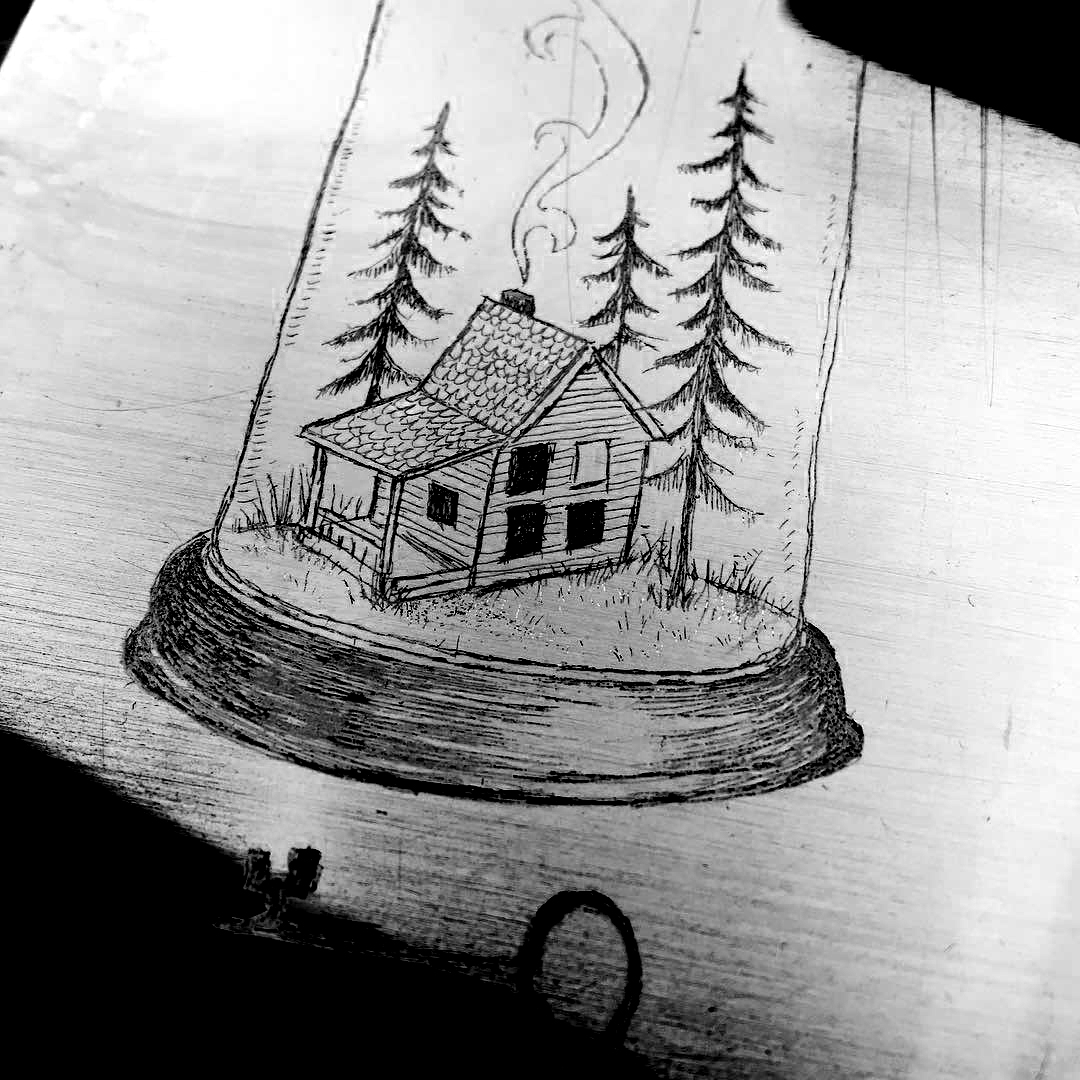
Here is a picture I took with my phone after working the drawing in the hard ground, then immersing the plate for three ‘bites’ in the acid. This plate will serve as my re-entry to the world and techniques of etching, since it’s been over 7 years since I took my first class, so I didn’t spend a ton of time on it
The way this process works:
1. Coat copper with ‘hard ground’ which is basically a sort of wax
2. Draw into the hard ground, exposing the copper
3. Immerse the plate (carefully, wearing gloves) into a bath of ferric-chloride solution. The longer it is in, the deeper and the acid ‘etches’ your lines into the copper, so they hold more ink.
It’s very similar to the photographic process in that way. So if you want some lines to stay very thin, you do a ‘first bite,’ then mask off some areas. Immerse for a second bite, etc.
This means that even though I used the same scribing tool on the whole plate, the result is three different line weights in the image, which will be more apparent when I do my test print.
Below is a sort of preview that I did just by inversing and using photoshop to fake it, but as this can’t show the depth of the lines, it’s not a true preview of a print.

Hi! Lovely post.
I just wanted to let you know of a serious issue that could affect our freedom of creating content on the Internet; a new law about to passed in the EU (Article 13) that could affect all of internet users. Please visit my blog and read about it. It’s on the category Knowledge.
Fascinating! Thank you for describing the process. The creativity of visual artists astounds me.
Thanks for reading!