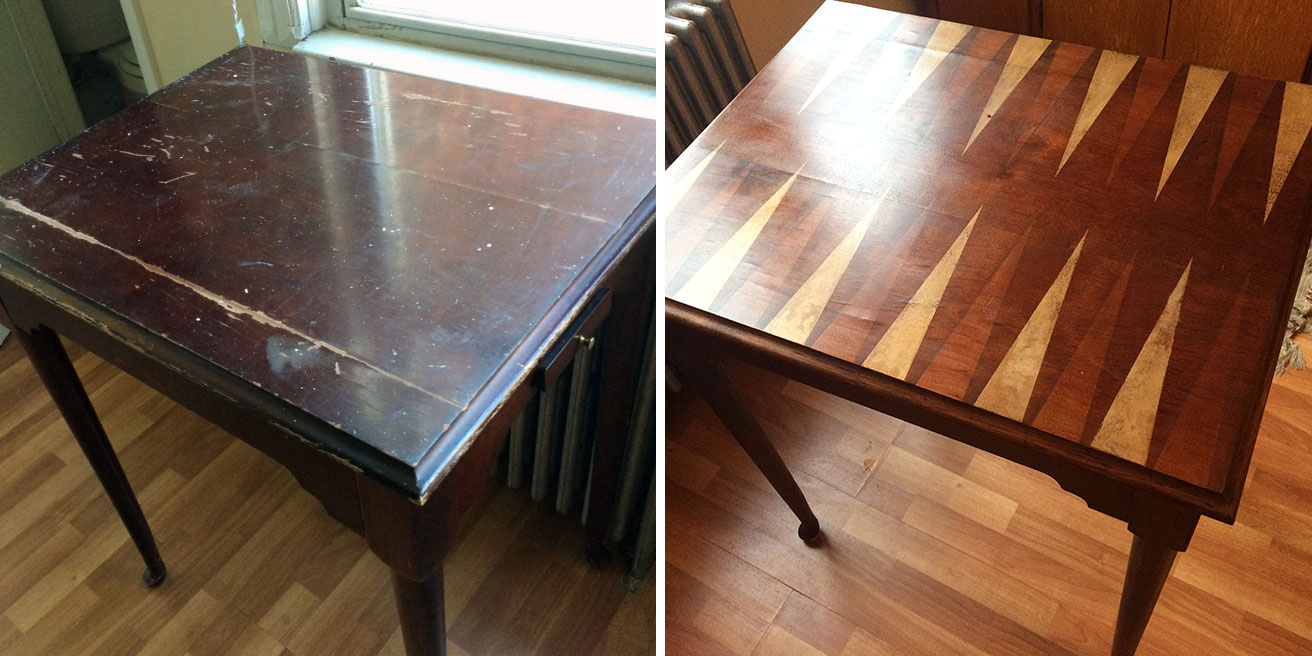
A few weeks ago, as I mentioned in this post, I found a discarded table around the corner from my apartment. It’s a modern reproduction, a simplified (straight legs not curved) variant on a Queen Anne style (yay, more QA!). It’s a gaming table to boot, as the top flips over and the obverse is felt-lined. A really pretty and well-constructed piece.
The post referenced above has a few ‘before’ images, including ones in which the Gaming Table aspects are shown, all of which have remained intact after this restoration of the exterior (top and legs only).
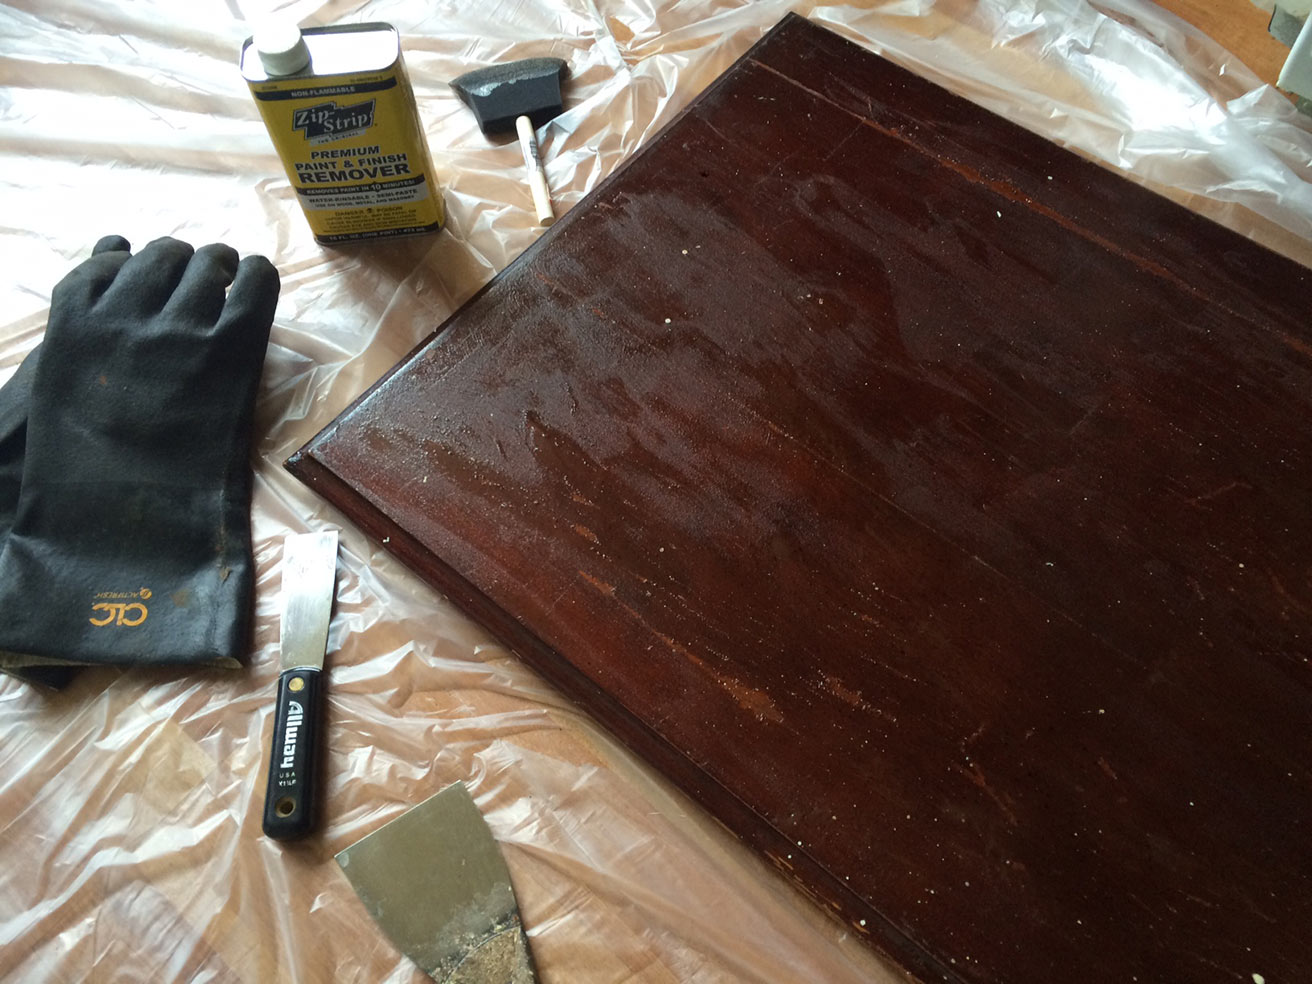
Drop cloth in place, the top surface is ready for stripping. Heavy duty gloves and disposable foam applicators, as this stuff is destructive (it will eat through latex gloves, don’t use ’em).
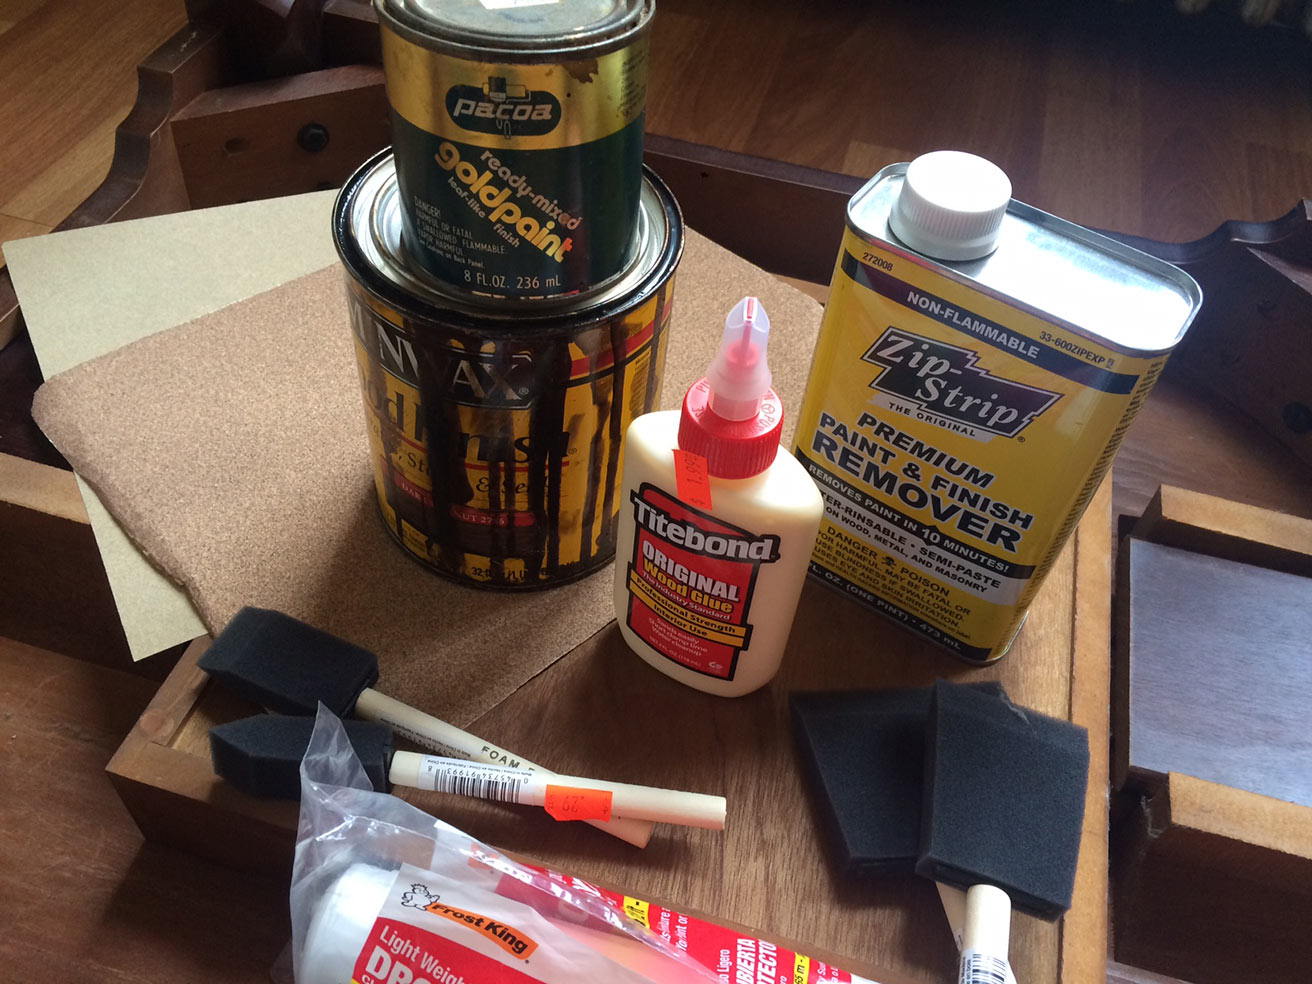
I used the fast-working type of stripper (with windows wide open and fan on on a very breezy day). Slather it on the wood— thick so it doesn’t dry too fast. You have to scrape the coating off while it’s still wet or it gets hardened.
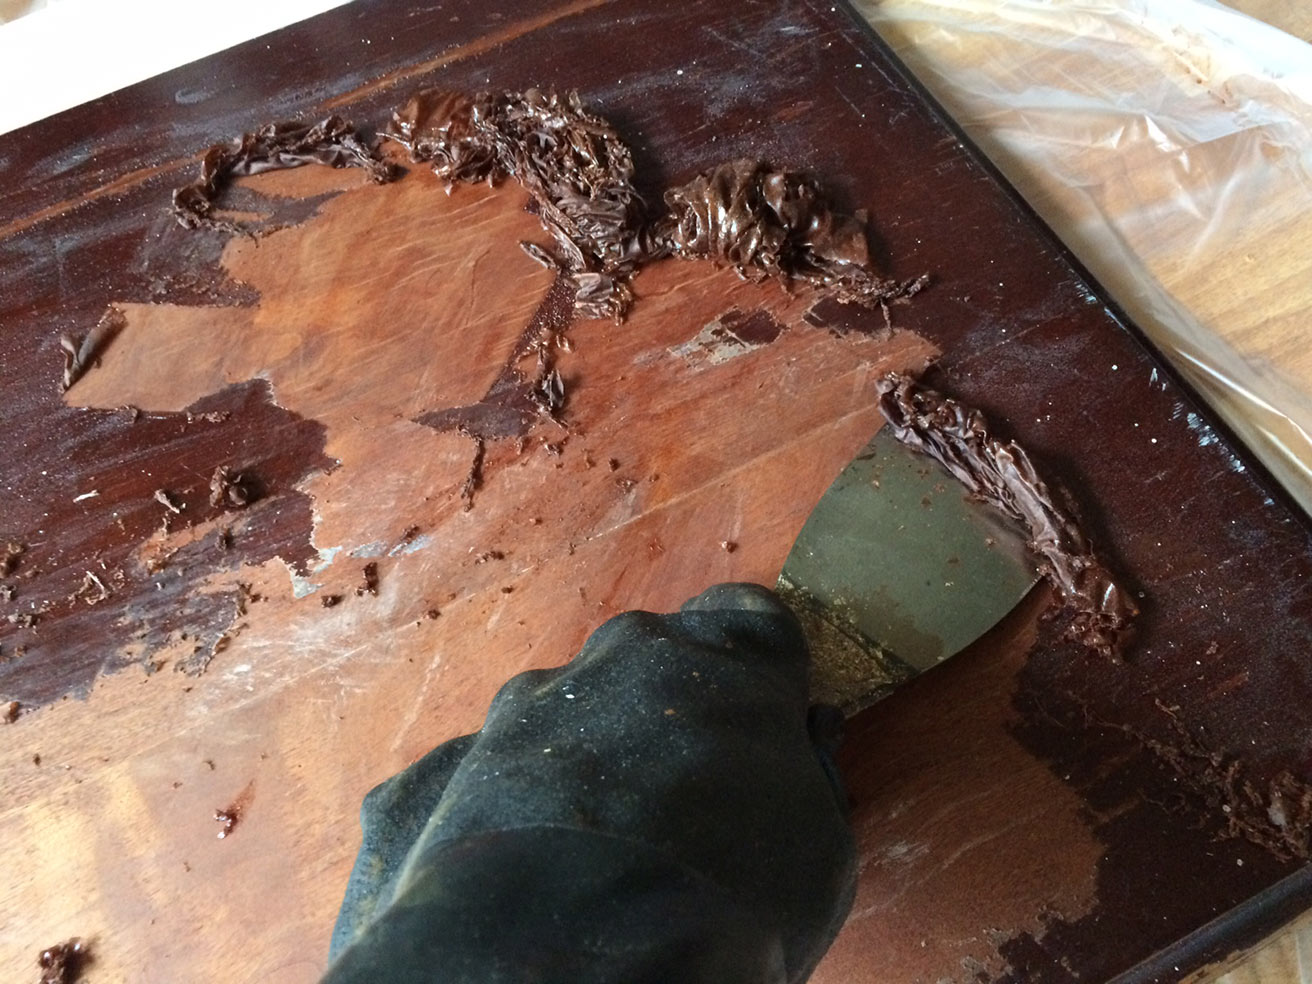 This part is immensely satisfying, all those layers of old finish coming off. I learned as I stripped the piece that several types of wood were used, which explains why it was finished in such a way that looked stained and polished like an antique, but was in fact an opaque, painted finish to hide the discrepancies. That also masks places in which wood filler was used.
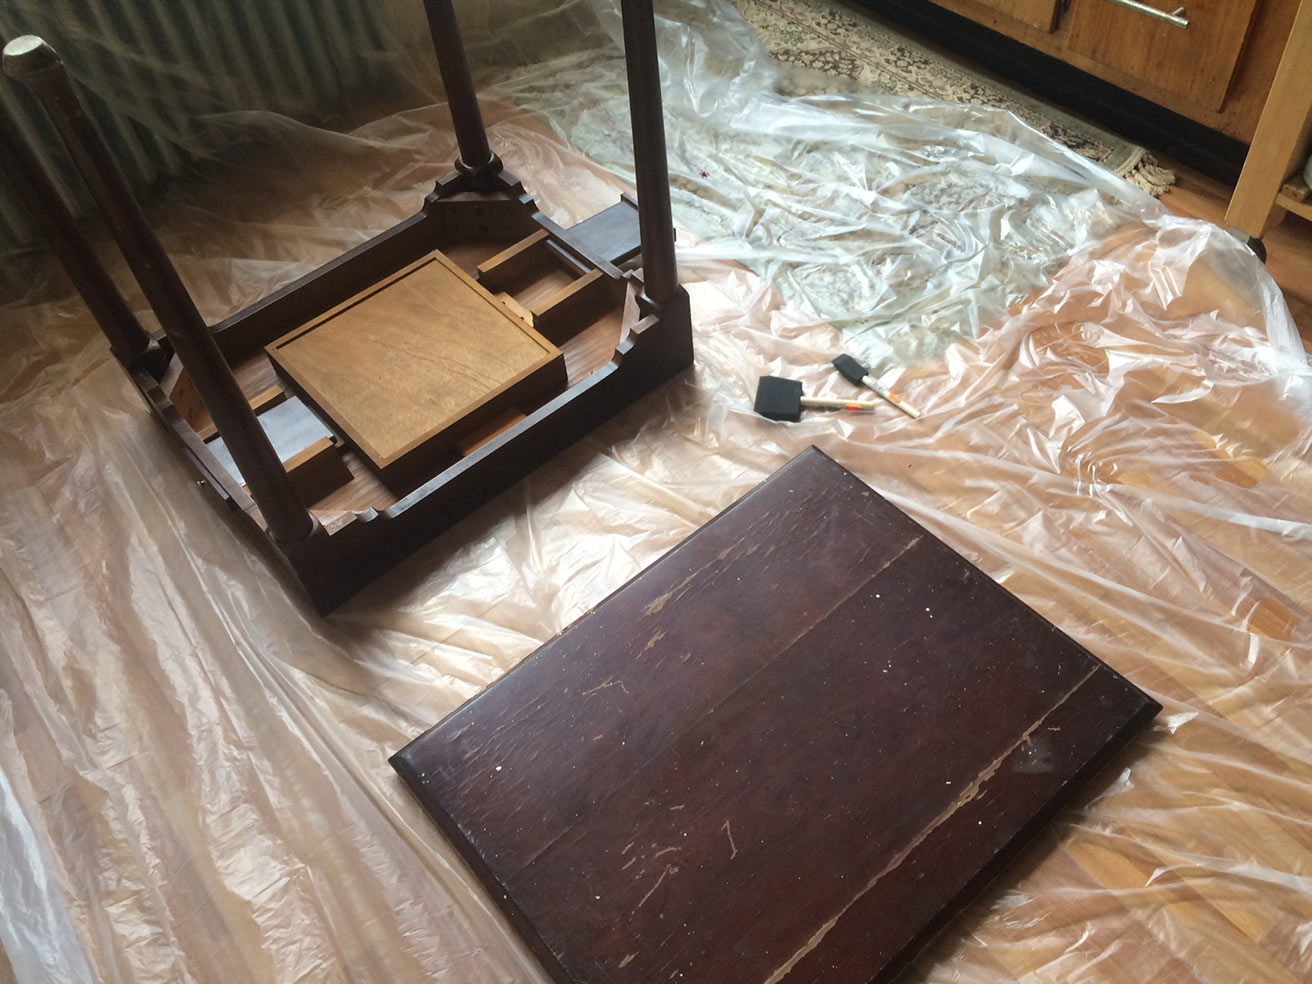
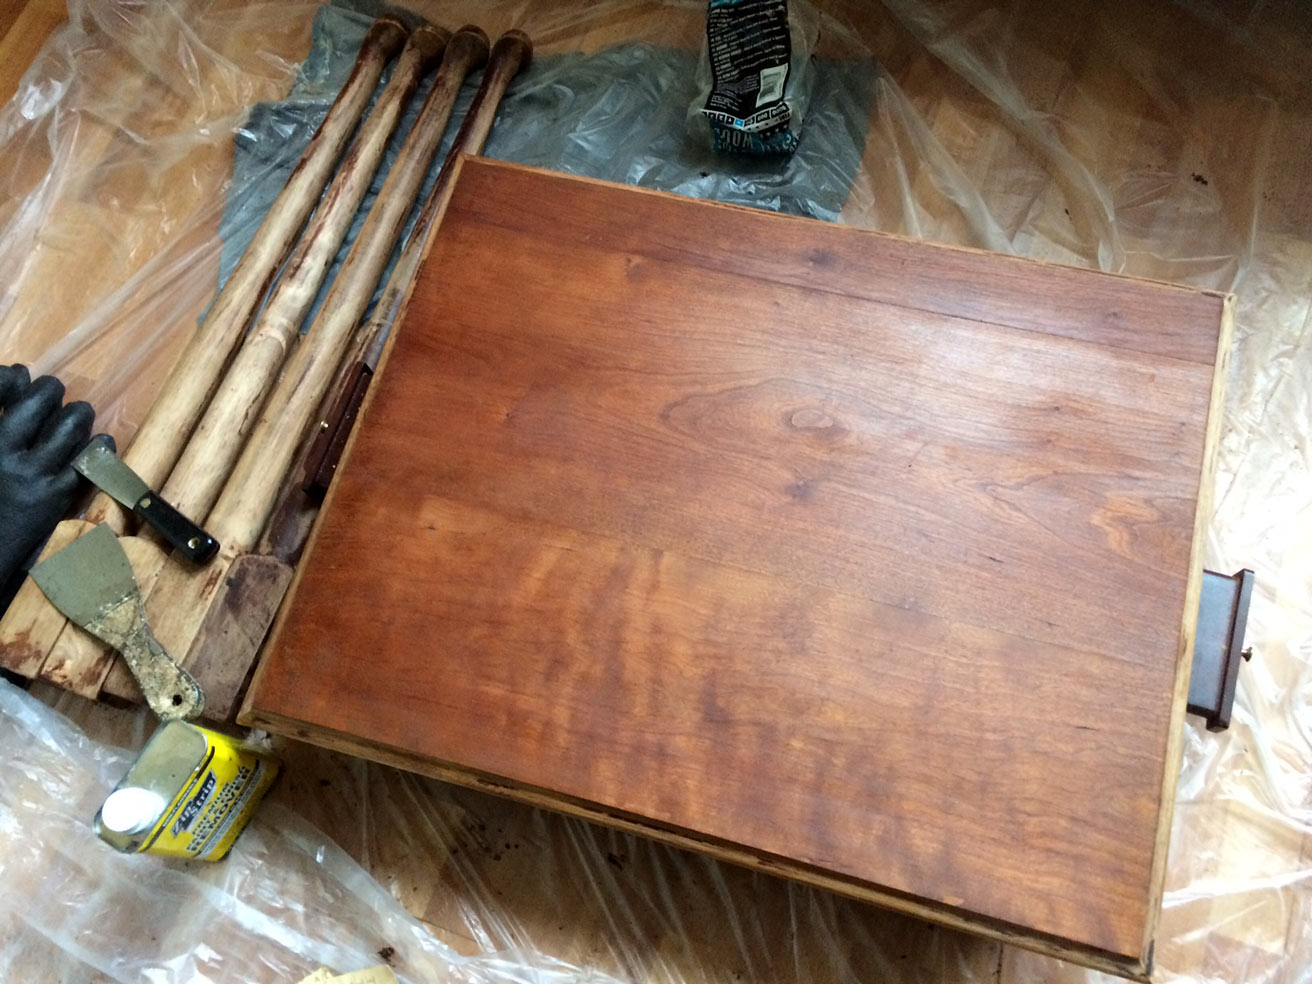 Behold: the top is beautiful all naked! It’s comprised of three boards, fused together, though not as well as they may have been, as the cracks show. It looks to be three pieces of heavy wood veneer, as the edges of the tabletop are a different color.
Here, the legs are about 2/3 finished being stripped. Those are time consuming as it’s all steel wool work. The top and edges also were labor intensive; once you get the large, flat areas clean, there are the ridges in the beveled edges, as well as always a few stubborn spots on the flat surfaces. Repeat, repeat, repeat.
Following removal of all (real talk: 90%) of old goo: SAND! (medium grit) and SAND! (fine grit)

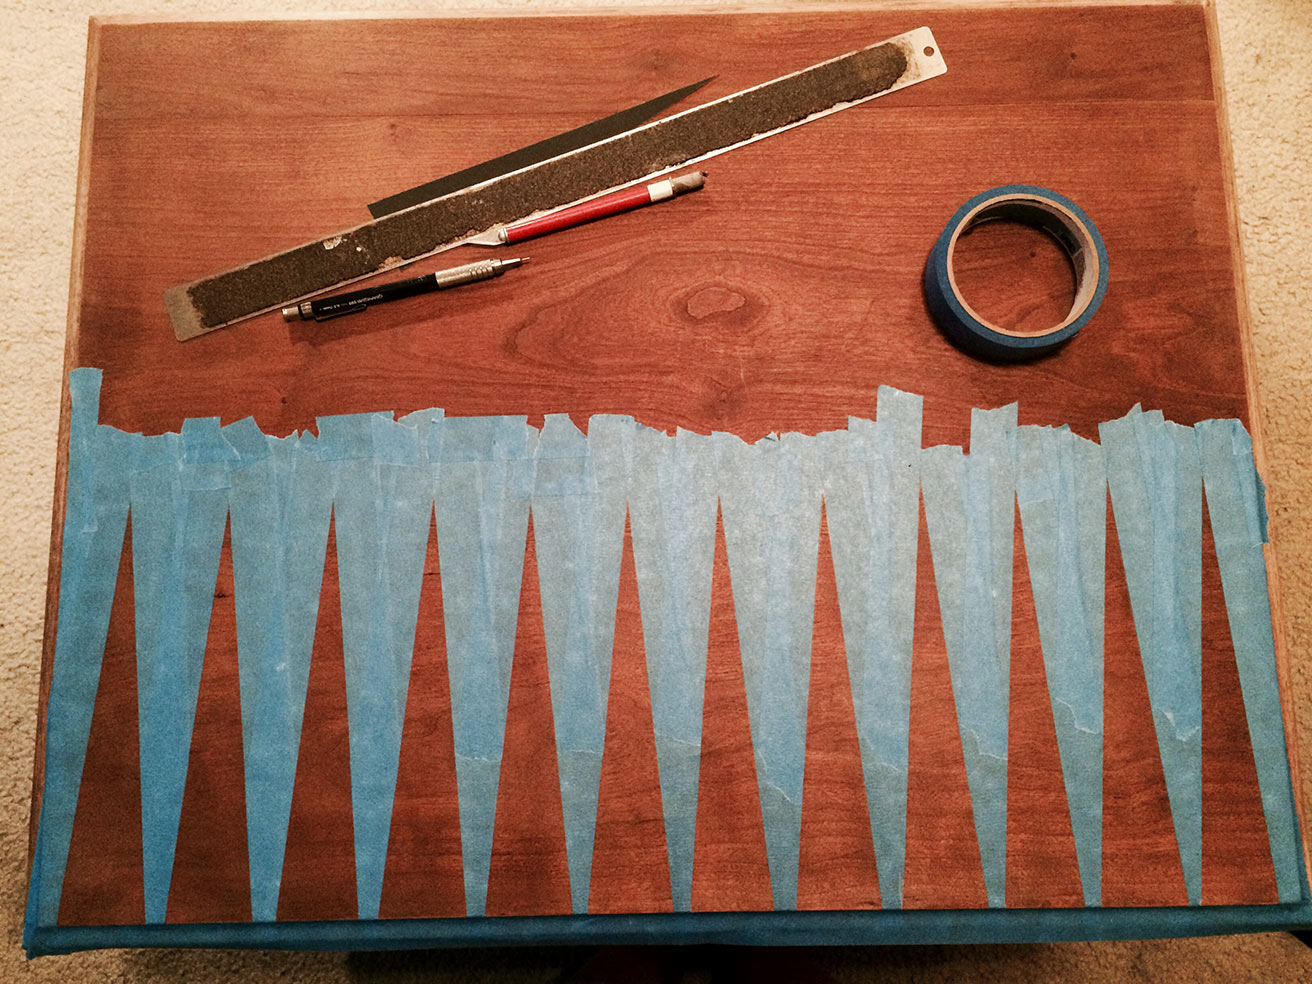
I decided I wanted a subtle sort of Backgammon pattern on the top surface. Having seen how beautiful the wood beneath the old finish is, I’ve elected to leave half of the diamond-sharp points natural, paint the other half metallic gold, and the remaining space will be completed with stain similar to the body of the table which I left intact.
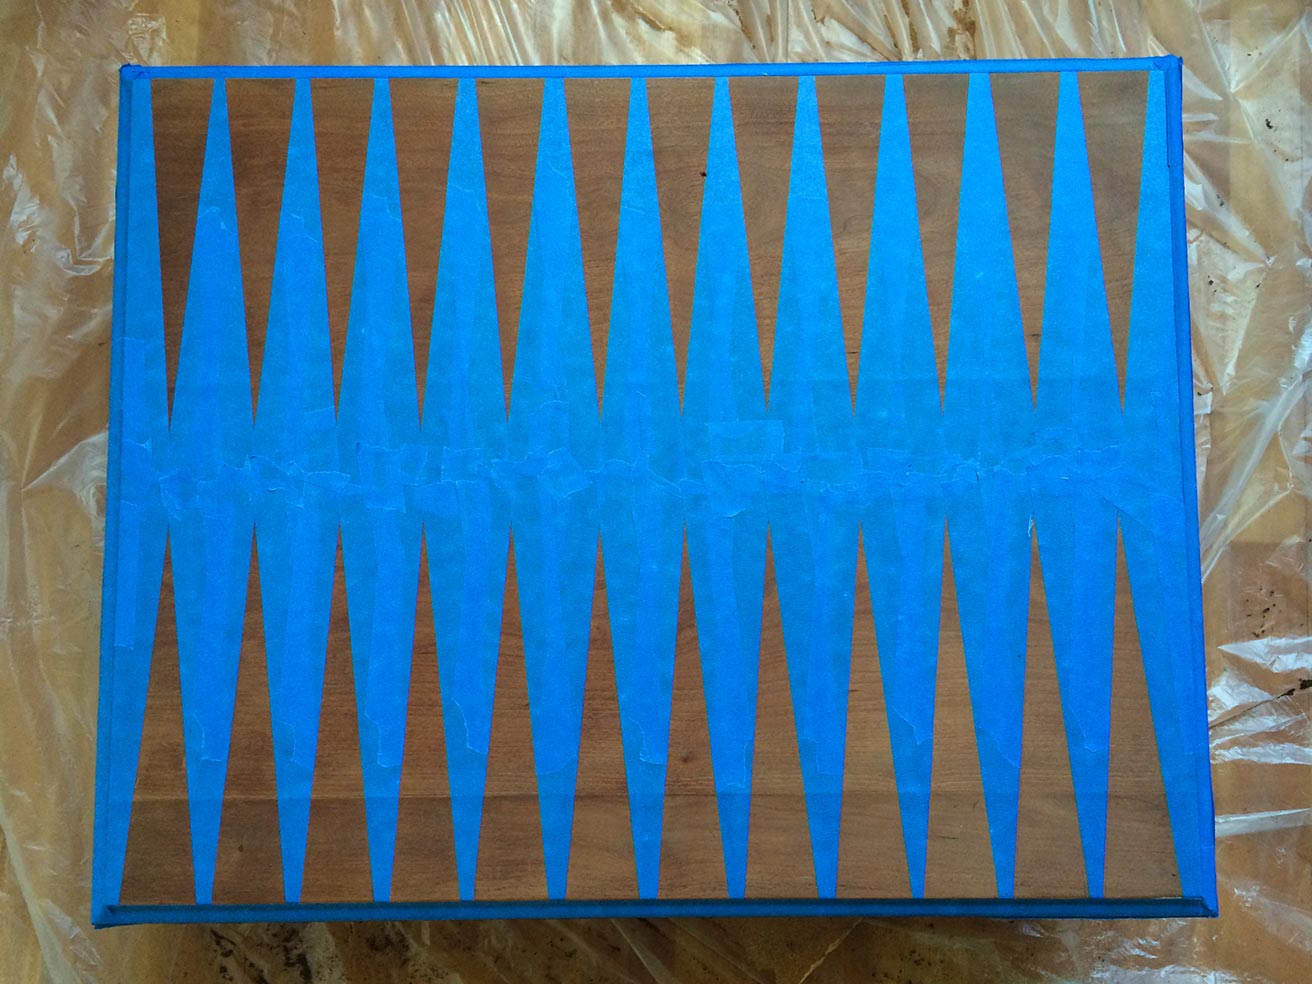
My primary concern: How to mask for stain? Stain is penetrating by nature, unlike paint which sits on top of a surface, so tape isn’t going to result in clean lines. After a bit of research, I found an ingenious solution: mask for where I don’t want the stain and spray clear coat there. Those areas will then have a clear coat mask, preventing the stain from soaking in.

If you look at the zoom-in of the image below, you’ll see where some pencil lines remain. I used a kneaded eraser to remove those. I used it, too, before clear coating, so no lines would be under the clear coat (also it’s a good way to ensure all the tape is really lying flat and close to the wood). The lines were guides both for laying the tape and for trimming the overlapped parts with the ruler and x-acto knife.

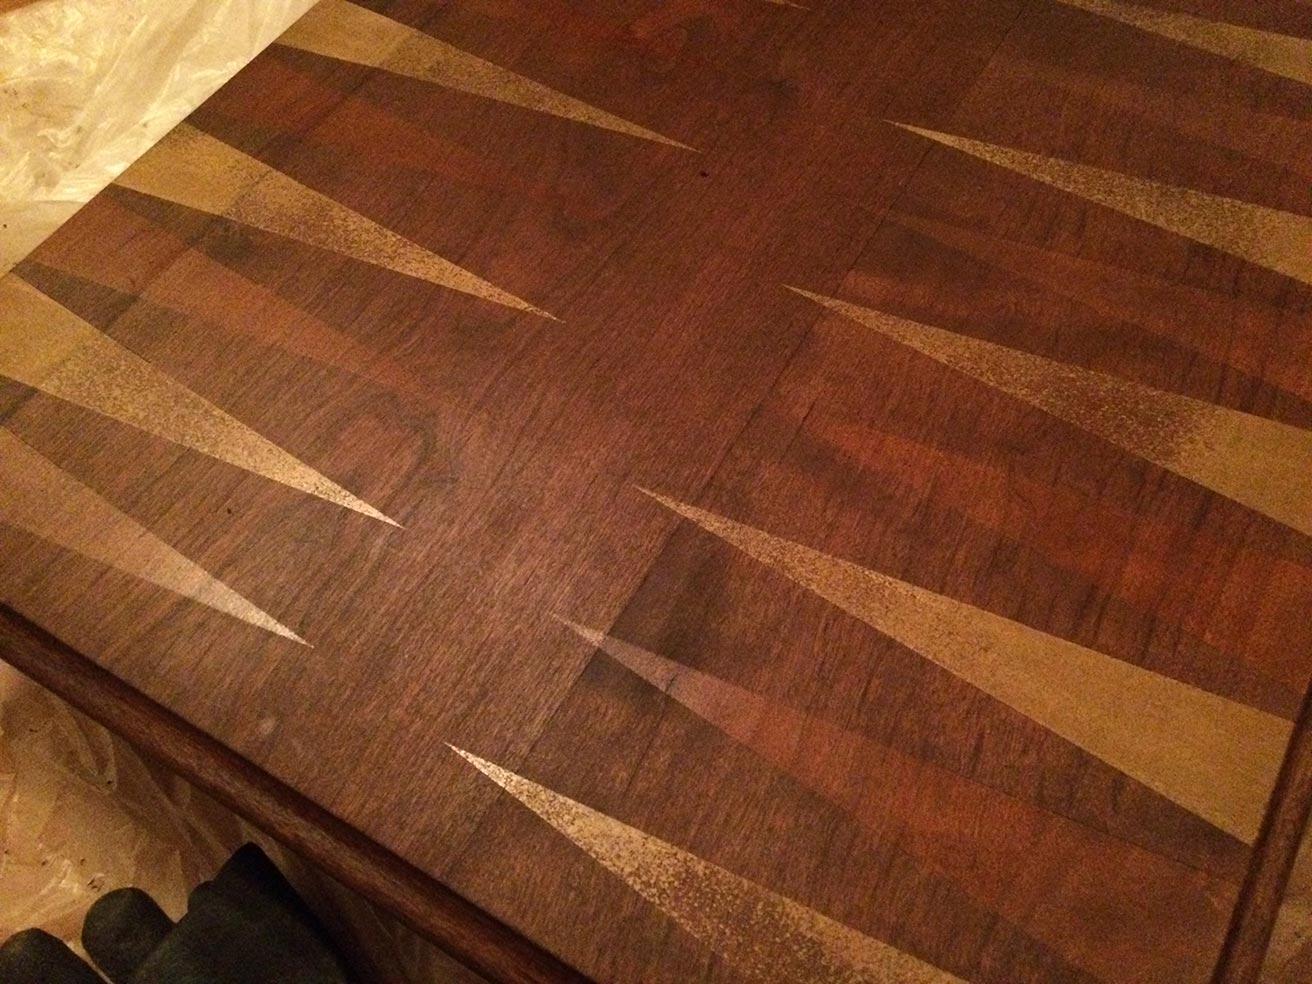 Here is where things got interesting. While, in theory, the masking with clear-coat plan should have worked, there was a flaw in my approach. The clear coat I used ought to have been water-based for this to really work, because the stain is not.
I used two different stains mixed together to get the desired color; one was pure stain and one was a stain and finish, but both were solvent based. That means they broke down the solvent-based clear coat somewhat, even though the stain was on for only a few minutes. As you can see, the points deteriorated somewhat as a result.
(To clarify: with this sort of ‘additive’ layering, alternate water-soluble with oil- or denatured alcohol-soluble.) Yep. That’s clear.
 My first step was to go back in, post-staining, with the gold paint and a fine brush, to bring some of the body back to those. It achieved a sort of antiqued look that I actually really like. (Bob Ross: happy accident!)
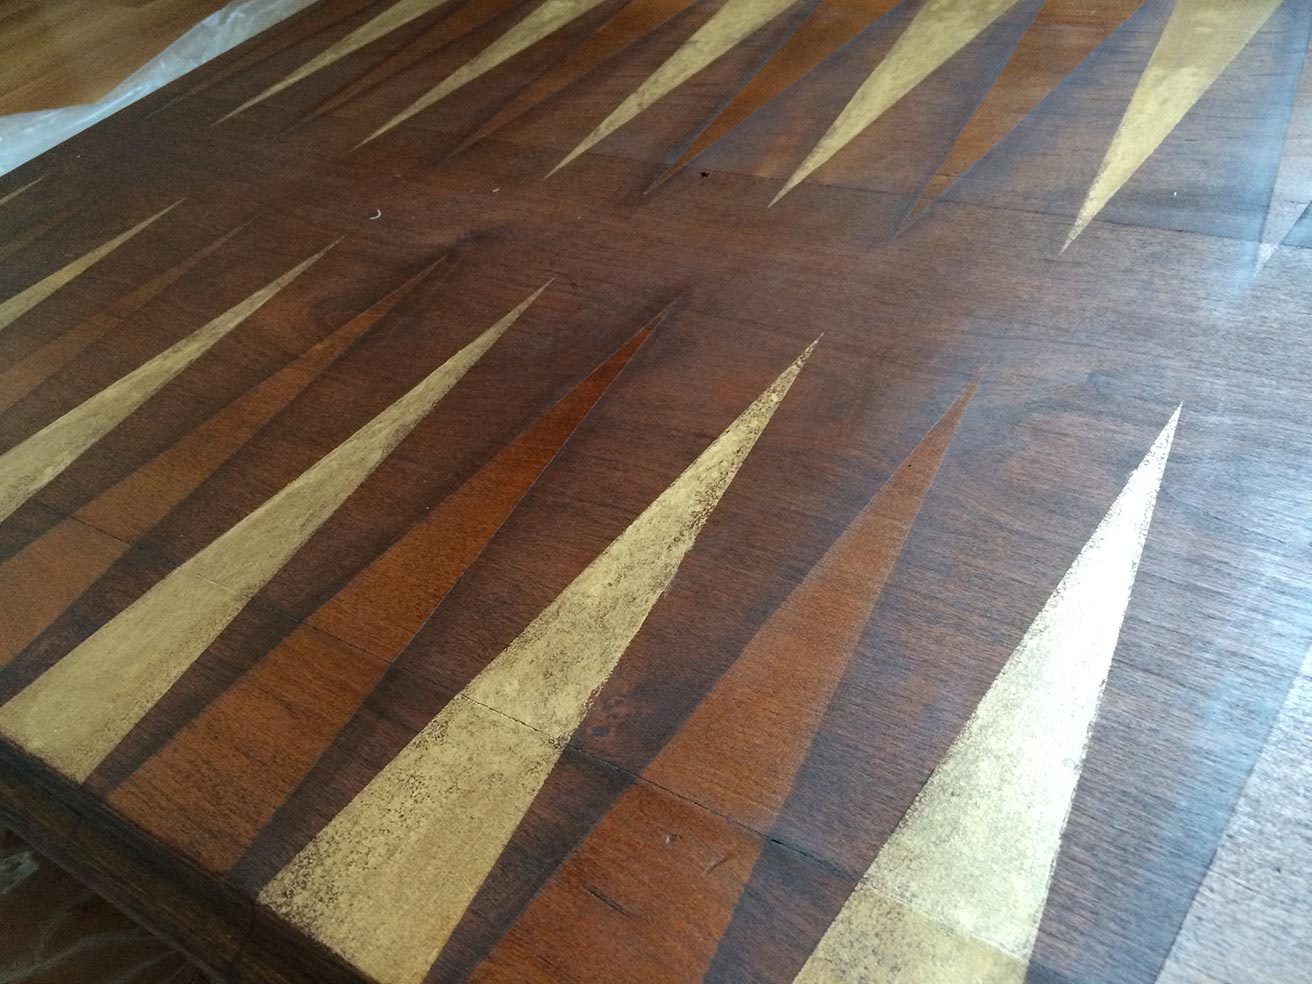 Following that, I spent some painstaking time with oil paint (burnt umber) and a fine brush to create ‘halos’ of dark around the natural wood points to make them more clearly defined. They were a less subtle than I hoped, so I did a really quick stain layer again, and they softened nicely.
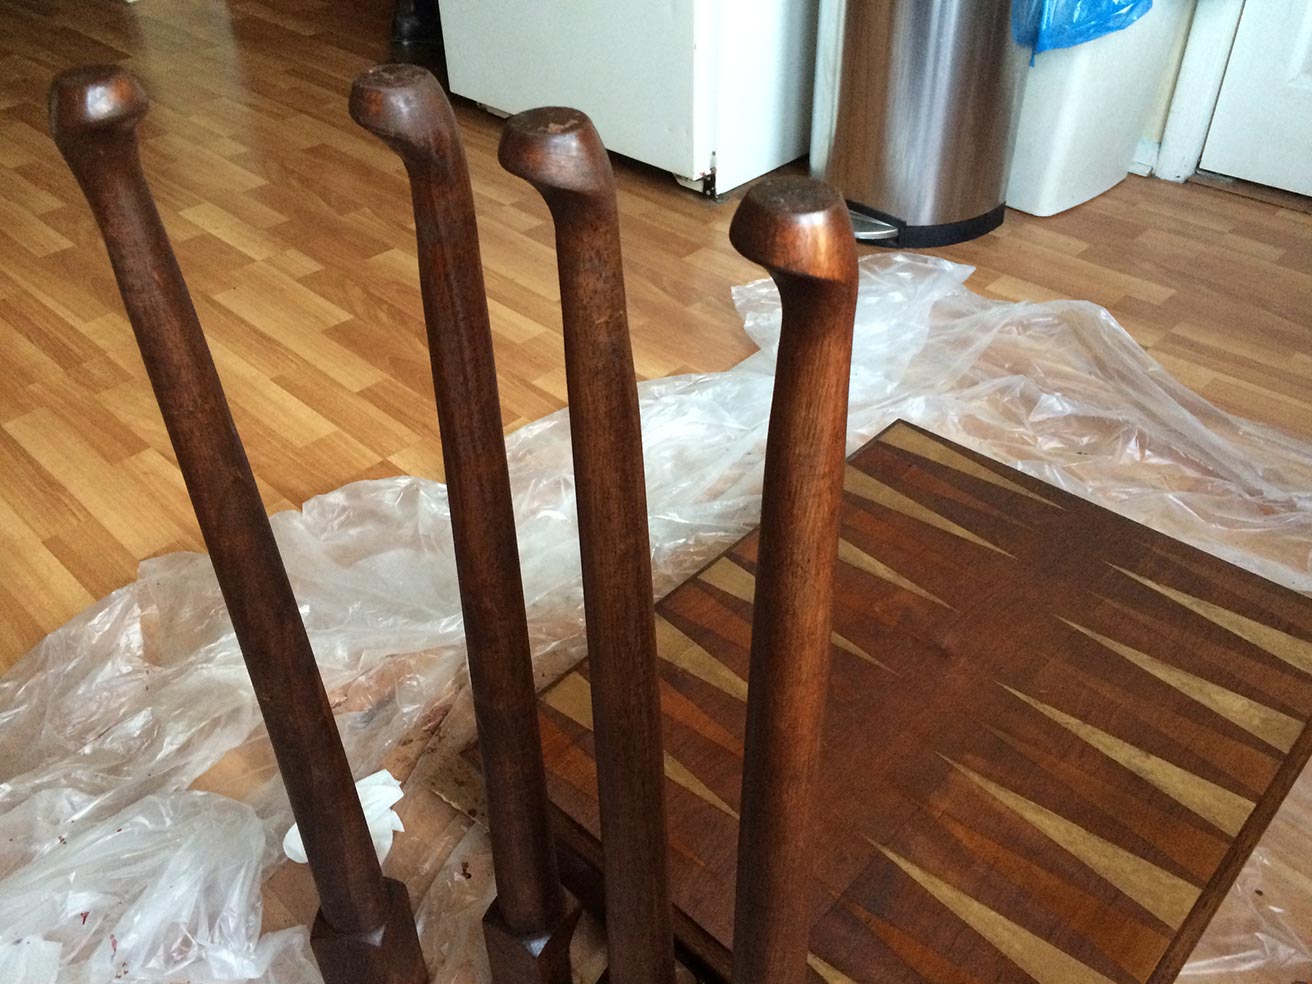
On to the legs, which I’d nearly forgotten about after all that stain drama.

I used a combination of Dark Walnut (stain) and Sedona Red (stain and seal). While I simply combined them on the table top, I applied them in phases for the legs. The legs were very pale, so I did a coat of walnut to deepen the color (as you can see above, bottom halves of legs), then followed with two coats of the red. By the way, one thing not pictured is a stash of old t-shirts to cut up and use for wiping the stain off.
 Here is the table put back together and looking very much finer than when the poor neglected thing followed me home.
Final phase: Finishing.
I originally planned to polyurethane it, but after seeing how beautiful that wood is, opted for a softer and infinitely more subtle approach: Butcher’s wax. Below is the table after three coats of waxing and buffing. This means it will periodically have to be re-waxed, and is not immune to water, etc. I’ll see how it goes. It may, ultimately, want something more like a thin varnish ,especially being close to a radiator, and in a kitchen (!)

A nice place to sit at the window in the kitchen.
It’s a shame that manufacturers feel a need to make a piece look ‘perfect’ in order for it to sell, even when using hardwoods. A stained table is far more durable and forgiving of wear than one with a thin, opaque finish such as this had (such as the crack in the finish where the boards were ill-joined). Part of the beauty of wood is all the texture and variation in it.
____
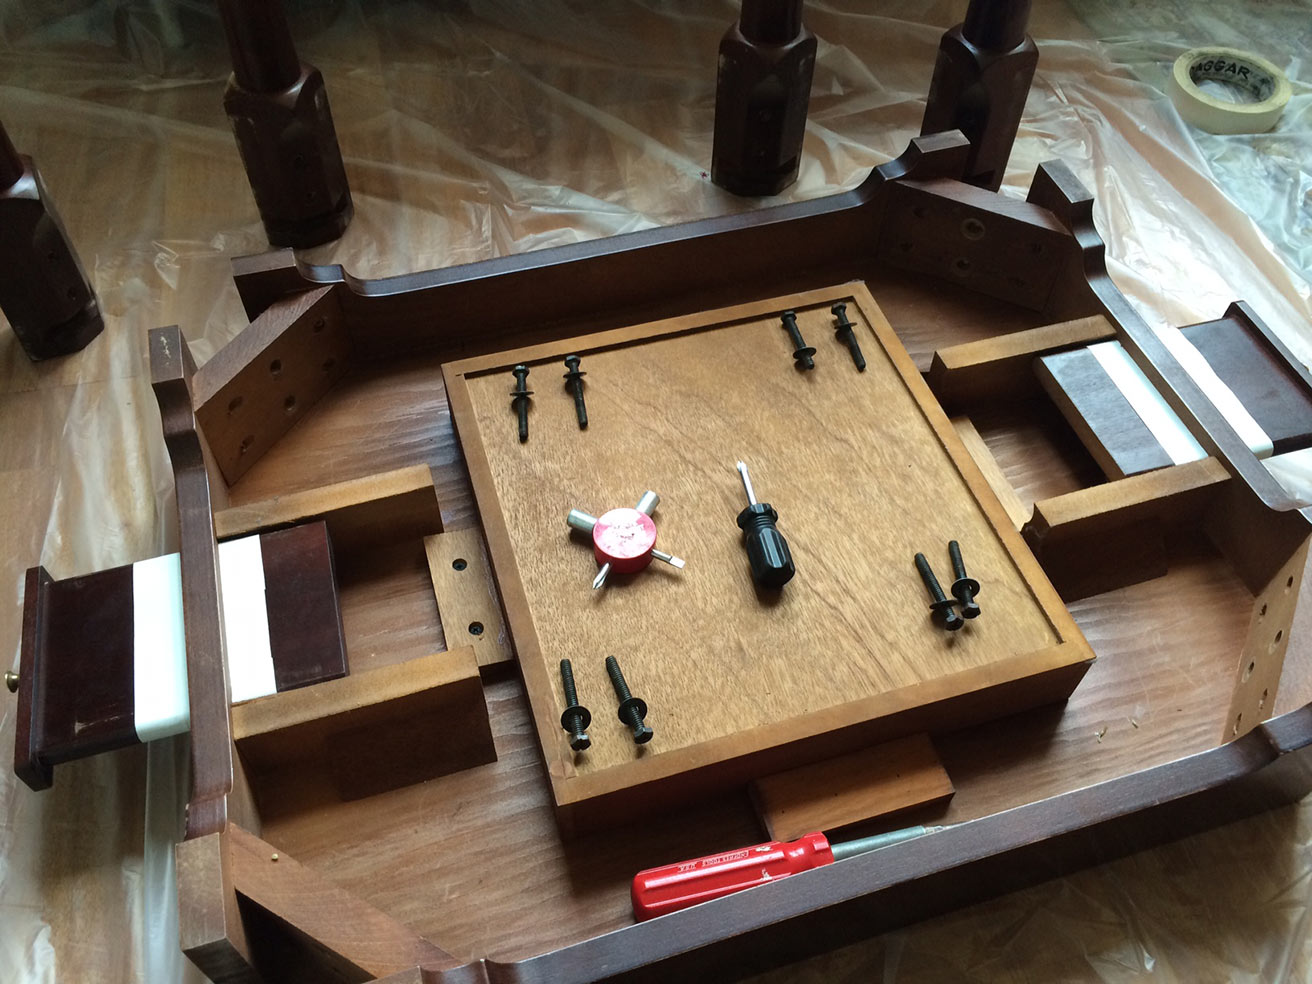
*A note on the wood glue: I wanted to glue the leg joints so they wouldn’t loosen and get wobbly (this was an item shipped flat and made to be moved easily; removable legs). But wood glue it only works on raw wood, and since I used the stain + finish mixture, I used Liquid Nails™ instead. That shit is amazing.
Also: I’d have done well to use two drop cloths, as things get holes in them that are made of such thin plastic! Luckily, the small amounts of stain and paint that got through came off easily with a bit of paint thinner.

Wow!! Love the final look of the table!! Super cute idea
Tonee
https://infoellablog.wordpress.com
Thanks!
Great job! I know firsthand how difficult and time consuming that type of work can be.
Thanks, Charlotte! Yes, you know very well 🙂
Wow that’s very cool and creative!! I love what you did!
Thanks so much!
So beautiful! 🙂
Thank you! It was an educational and interesting process, but I’m happy with the result.