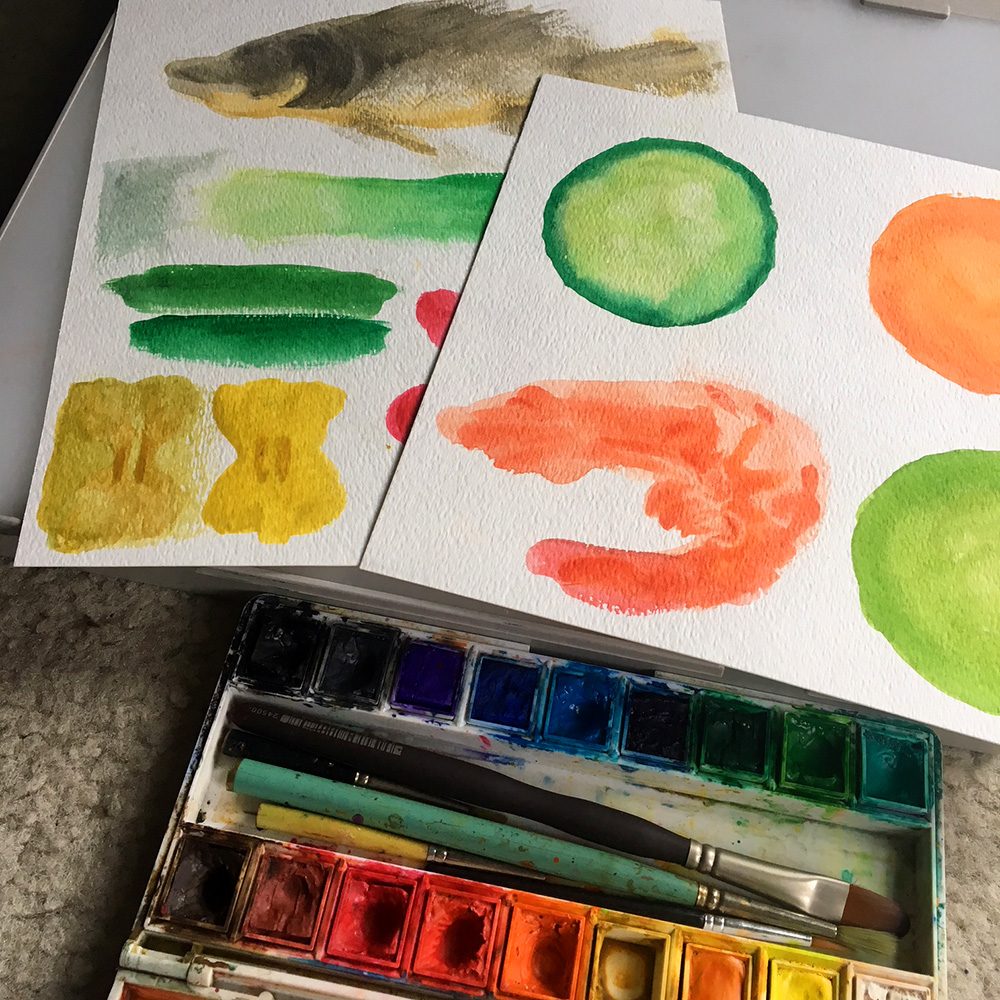
 Last week I posted some gentle little watercolors, and briefly described the process. Here, as promised, is a more detailed view of that process.
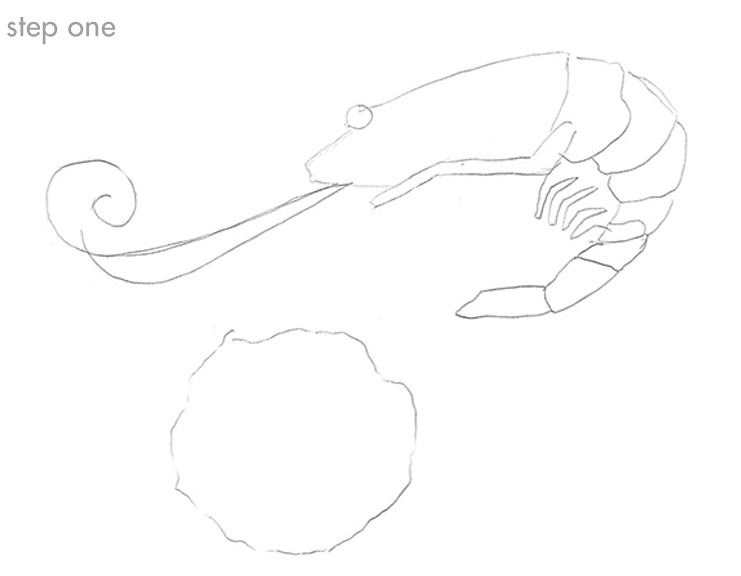
Step one: Draw your shapes in pencil.
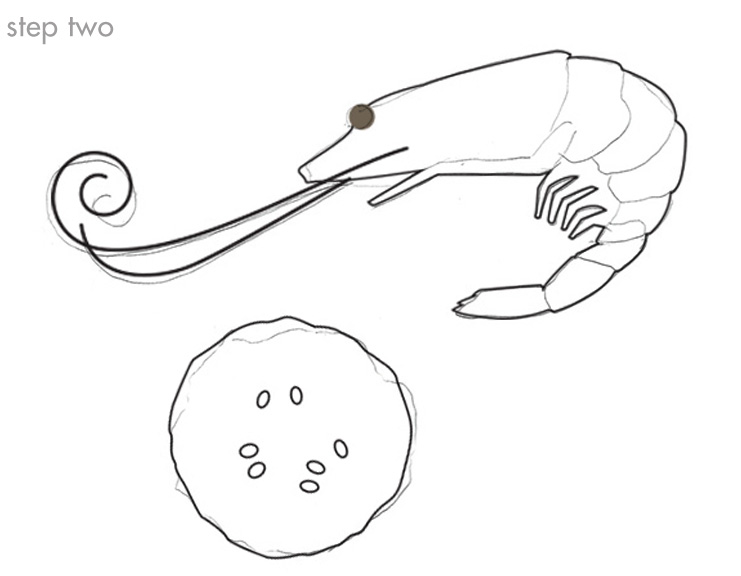
Step two: scan the drawings, and import to Adobe Illustrator. Trace the shapes using the pen tool, refining as you go, to create your idealized vector shapes.
Step three: print out your vector shapes. Tape the print to the back of a sheet of watercolor paper, and place both on a lightbox. Now you can paint with precision using the vector shapes as your guide. Be sure to bleed the color outside the lines so you have some wiggle room.*
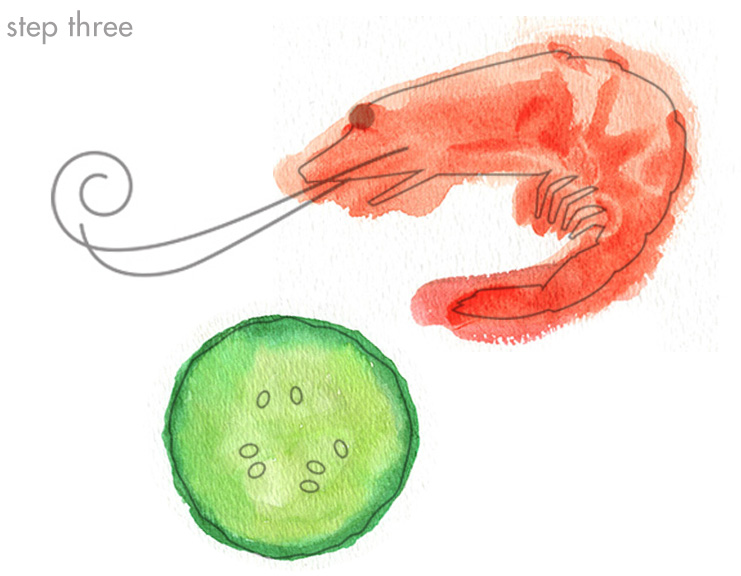
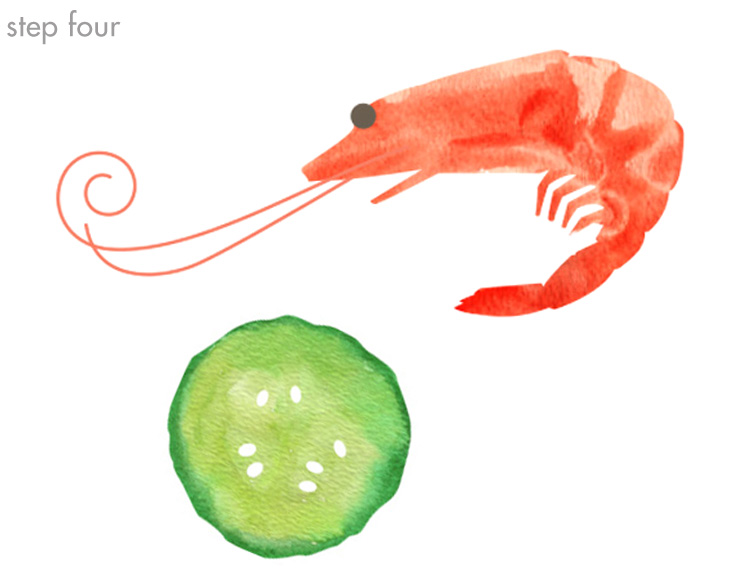
Step four: Scan your watercolors and import to Illustrator. Using your vector shapes, you can create a clipping mask for your hand-painted fills. (For this little prawn, I matched the color of his feelers to the paint, and kept the vector circle as his eye.)
The finished product is an illustration with all the the warmth and charm of watercolor, and the crisp edges of a digital drawing. And, as each drawing is self-contained, you can move them around like puzzle pieces to create all sorts of compositions.
This process would work using any number of media— pastels, acrylic, colored pencil, ink, etc. I love this technique, woot!

*Pretty sure this is somehow a rule of Life.

[…] month I created more images using my watercolor paired with digital vectors technique, this time for some editorial illustrations. They were for an article suggesting things […]
Oh my god, love them, Liz!!! 😍 Many greets and loads of good energies from us both! (It´s 2 days holiday here 💪 💪 )…
Thank you Luiza! I hope you two enjoy the holiday 🙂 We have a long weekend coming up too. I love the book you’ve been working on, by the way!
Thanks a bunch, dear Liz, it´s so much fun working on it, i cling to every free mind moment i get to work on it🙂 You too, enjoy the coming weekend!! Lots of hugs!
Hugs to you, too! 🙂
So great to see this step-by-step. Thank you!